


Drunken Otter American Brown Ale
The story behind Drunken Otter American Brown Ale
It wasn’t until roughly 18 months ago when I felt confident enough to start making my own beer recipes. Due to space, equipment and knowledge constraints, it wasn’t until this year when I switched over to all grain brewing and started using the brew in a bag method on my stovetop.I purchased a nylon mesh straining bag from my local homebrew supply store with an idea in mind. I’m a fan of brown ales, and one type of English barley malt that’s popular in them is Maris Otter. A nickname that my family stuck me with a long time ago was “Otter” (long story, trust me), so I decided to make a brew incorporating the two. Otter Beer didn’t sound as appealing, or as funny. Then I remembered one of my good buddies affectionately calls me “drunken b*st*rd”. I combined the two, and Drunken Otter was born.
Take out the guesswork, use brewing software like Beersmith
 Granted you will need to occasionally do brewing calculations by hand and calculator. I think it’s best everyone who does brewing should know how in case the zombie apocalypse occurs and they live long enough to make some beer. I digress though, and I’m sure you can tell I’m joking about the zombie apocalypse. But there is computer software out there that allows you to take a decent amount of the guesswork out of brewing. You can find a list of available brewing software at Homebrewtalk, an online forum I joined when I first started out. Myself, I use
 Beersmith. Beersmith allows you to fine tune your recipe when it comes to alcohol percentage, color, bitterness from hops, track fermentation, you can keep it simple or get really technical. It comes with pre-loaded recipes, or you can create your own based on an established style. Below is a screenshot of a pre-loaded recipe in design mode so you can get a rough idea of how it looks
Creating a beer recipe
Now, when creating a beer recipe, if you’re going with an established style you want to use the right grains, yeast and hops. Brown ales are, well, brown, so aside from the base malt which gives the grains the enzymes needed to create the basic sugars the yeast needs to chow down, you need specialty and adjunct grains to help give flavor and aroma. Specialty and adjunct grains are treated differently than base grains in that they are malted differently and are either kiln or drum roasted to certain points to modify the sugars in the barley. I used brown malt, chocolate malt, and caramel malt in addition to the Maris Otter base malt to give the brown ale its trademark color and sweet, bready smells and flavors. These malted barley grains are then crushed by a grain mill beforehand to crack their husks and expose their insides so the enzymes and sugars can be released during mashing.
What goes into the brewing process: Mashing
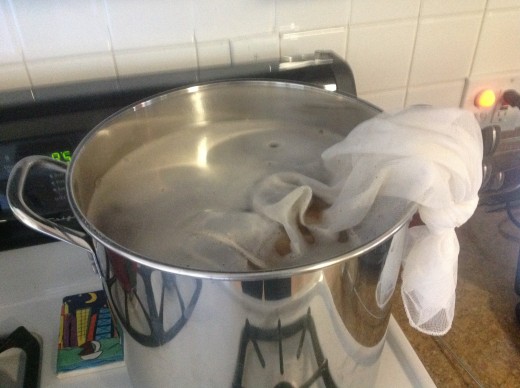 With the brew in a bag method, you’ll need at least a 5 gallon pot, preferably stainless steel. You’ll need a gallon of water for every two pounds of crushed malt you use. Since I do three gallon batches, I’ll need six pounds of grain. Put the grains into the mesh bag, make sure to keep it loose, then tie up the open end. Heat your water to 160 degrees F, then gently place the bag in the pot. Check the temperature with a thermometer, it should drop to around 150 degrees F. Hold the water around this temperature for 60-75 minutes, depending on the recipe style. Some beers require longer mashing times than others. Work the bag around with a large stirring spoon so the grains are able to move inside and release the enzymes needed for boiling and fermenting. Once time is up, lift the bag out of the sugar water mix in the pot, now called wort, and let any liquid left in the bag drain out. This may take a few minutes. I’d urge against squeezing the bag, as this will release tannins and other particles you don’t want into the wort and damage the flavor of the beer.
Boiling process and adding hops
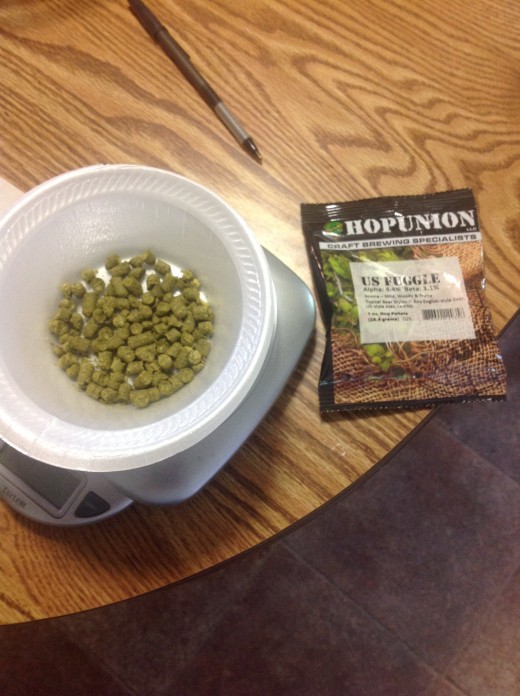
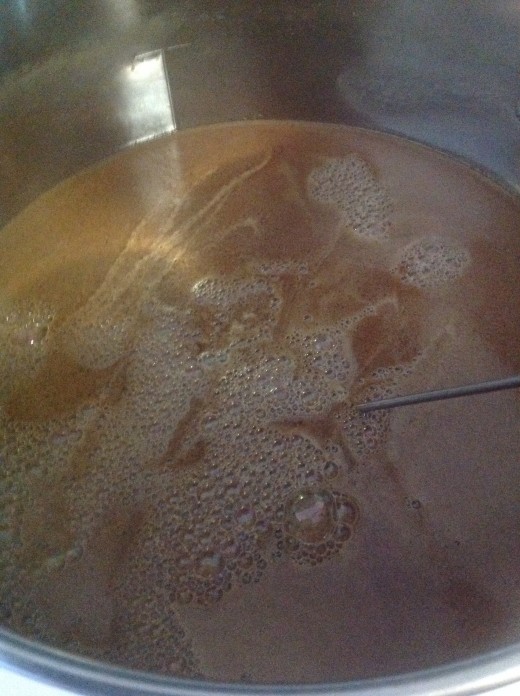 Once the grain bag is removed, it’s time to bring the liquid to a boil. Set your burner on the highest setting until a foam begins to form and then breaks, showing signs of boiling. This is the time you begin adding your hops. Even though Drunken Otter is an American Brown Ale, I decided to change a few things based on results I got back from a competition and used East Kent Goldings hops for bittering the beer and Fuggle hops for flavors and aromas. Both hops are originally native to England, where brown ales originated. However I went with the US version of Fuggles, partially because the aroma profile is slightly different, but I’ll admit being lazy and not asking my homebrew supply store if they had the UK version.
Hops. I’ll keep it simple for now.
 A little history lesson. Hops haven’t always been used in beer. Looking back through the history of it, hops have only been used for roughly 1300 years. Not exactly new, but they’ve stuck around. Before then, people just used a variety of herbs and roots to bitter and flavor the beer. Beer, when brewed, is sugar water in a sense, and something is needed to balance out the sweetness and give some preservative acids to allow it to last longer. While there are hundreds of varieties of hops worldwide, they are used only for three functions in beer: bittering, flavor, and aroma. Hops for bittering are added at the start of the boil, and any flavors or aromas they contribute get cooked off, but their acids remain. Hops with higher acids are usually used here for beers like IPAs where a lot of hop bite is wanted. Flavoring and aroma hops are added within the last 15 minutes of the boil. These hops don’t offer much in terms of bittering acids, but give citrusy, spicy, pine, or earthy aromas and flavors found in pale ales or lagers.
Ok, maybe not as simple as I’d hoped, but it’s something worth going in depth on at a later date.
Hoppy times (yeah, lame, I know)
Final thoughts
 Ok, I admit I’ve left a few things out for simplicity’s sake. I wanted to make this blog a basic overview of the brewing process. Experienced homebrewers are free to point out what I didn’t include, however I will cover things like making yeast starters, cleaning and sanitizing equipment, measuring alcohol content and building grain bills as time goes on. So until next time, happy brewing, and God Bless.